Learning to pour
| April 23, 2012 | Posted by eryn under Kids, Montessori |
 Our son is now 28 months old. Please note: I use the terms “he” and “him” in this exercise because my child is a boy and I find using “he/she” and “him/her” to be clunky.
This is a simple practical life exercise that uses everyday household objects. It helps to develop fine-motor skills by teaching a child to pour.
When you’re just starting this exercise, I recommend not filling the pitcher or measuring cup with more rice than the glass your child will be pouring the rice into can hold. It also helps to do this exercise over a small tray or baking sheet if you have one to keep the rice contained. If your child is left-handed, you’ll need to switch things up a bit (place the pitcher to the left of the glass, sit with your child to the right of you and pour using your left hand).
I adapted this exercise from Teaching Montessori in the Home: Pre-School Years: The Pre-School Years.

Materials needed
- Small glass
- Small pitcher or 1-cup measuring cup
- Rice
Exercise
- Fill the pitcher or measuring cup partly with rice.
- Place the pitcher or measuring cup to the right of the glass in your work area.
- Invite your child to the work area, sitting with your child to the left of you.
- Name all the objects and parts for your child (“pitcher,” “glass,” “spout,” “handle,” etc.).
- Hold the pitcher in your right hand with your first two fingers and your thumb on the handle.
- Grasp the glass in your other hand.
- With the rim of the pitcher in the center of the glass, slowly begin pouring the rice into the glass.
- Pour the rice back into the pitcher and invite your child to try pouring the rice back into the glass.
 Our experience
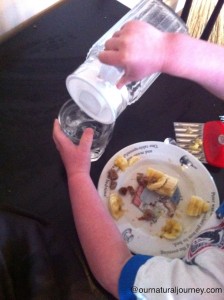
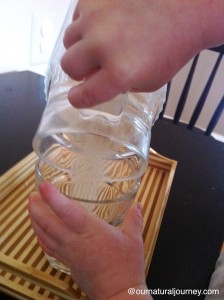
Our son first started pouring more than 6 months ago when I showed him how to transfer beans from one bowl to another using a spoon (he also enjoyed pouring the beans from one bowl to another). About a month later, he started pouring water from his water bottle into his glass and back again, over and over. I even provided him with a rag so he could wipe up his messes. Since that time, he has been practicing pouring with some regularity, although it wasn’t until recently that we provided him with a glass pitcher of his own.
This was our first experiment with pouring rice. One thing I noticed is that you have to tip the pitcher to a much greater degree to get the rice to pour from our pitcher than you do with water. Although the Teaching Montessori in the Home book recommends moving to water after your child perfects this rice-pouring activity, I wonder if that could cause your child to tip the pitcher too far when he begins pouring water for the first time.
Our son jumped right into pouring the rice from the pitcher into the glass. After performing this exercise a few times (with me always pouring the rice back into the pitcher from the cup), I let him pour the rice back into the pitcher, which caused a great mess on our table. No problem. I asked him to get his dustpan so we could clean it up, which he promptly did. And when he brushed the rice off the table, he really sent it flying — all over the floor. I don’t think more than a few grains actually landed in the dustpan.
Seeing where this was headed, I encouraged him to continue with his pouring exercise while I cleaned up the rice from the floor. At this point, he decided that he would simply use his hands to pick up the rice from the pitcher and drop it into the glass. Needless to say, this resulted in more of a mess on the table and floor.
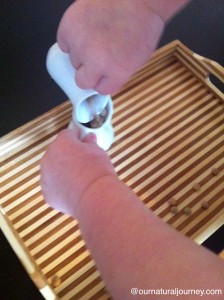
When he was finished with that, I gave him two small pitchers to try pouring lentils with. These are very small ¾-ounce pitchers that I purchased from Montessori Services. He has much more trouble pouring with these than the 8-ounce size, which are available to him at his Montessori class.
I would also note that although he has been using his glass pitcher to pour water regularly at all his meals now for a couple of weeks and usually does quite well, he still hasn’t got the hang of knowing when to stop pouring. He just keeps right on pouring, whether the glass is full of water or not. This is something we’re working on, but I try to limit the amount of water I put in his pitcher.
 Variations
- The easiest way to vary this exercise is to change the objects your child is using to pour or what he’s pouring. You can use measuring cups, glasses, pitchers, a tea set or other objects of various sizes. For pouring, you could use water, rice, lentils, beans, sand or anything else pourable that you would like to try.
- You can also change the location where your child practices pouring. The bath is obviously a great place to practice pouring water!
- Add food coloring to the water. If you use multiple cups, this is also a great way to teach about colors (yellow and blue make green, red and yellow make orange, etc.).
- Give your child a pitcher and let him pour water for everyone at your meals.
What are some other helpful pouring activities for toddlers?
Disclosure: This post contains an affiliate link. Thanks for supporting Our Natural Journey at no cost to you. For more information, please read my disclosure policy.


Great idea, Eryn! And I loved reading about your son’s experiences with pouring! Thanks so much for linking up with Montessori Monday. I featured your post at the Living Montessori Now Facebook page: http://www.facebook.com/LivingMontessoriNow
Thanks, Deb!